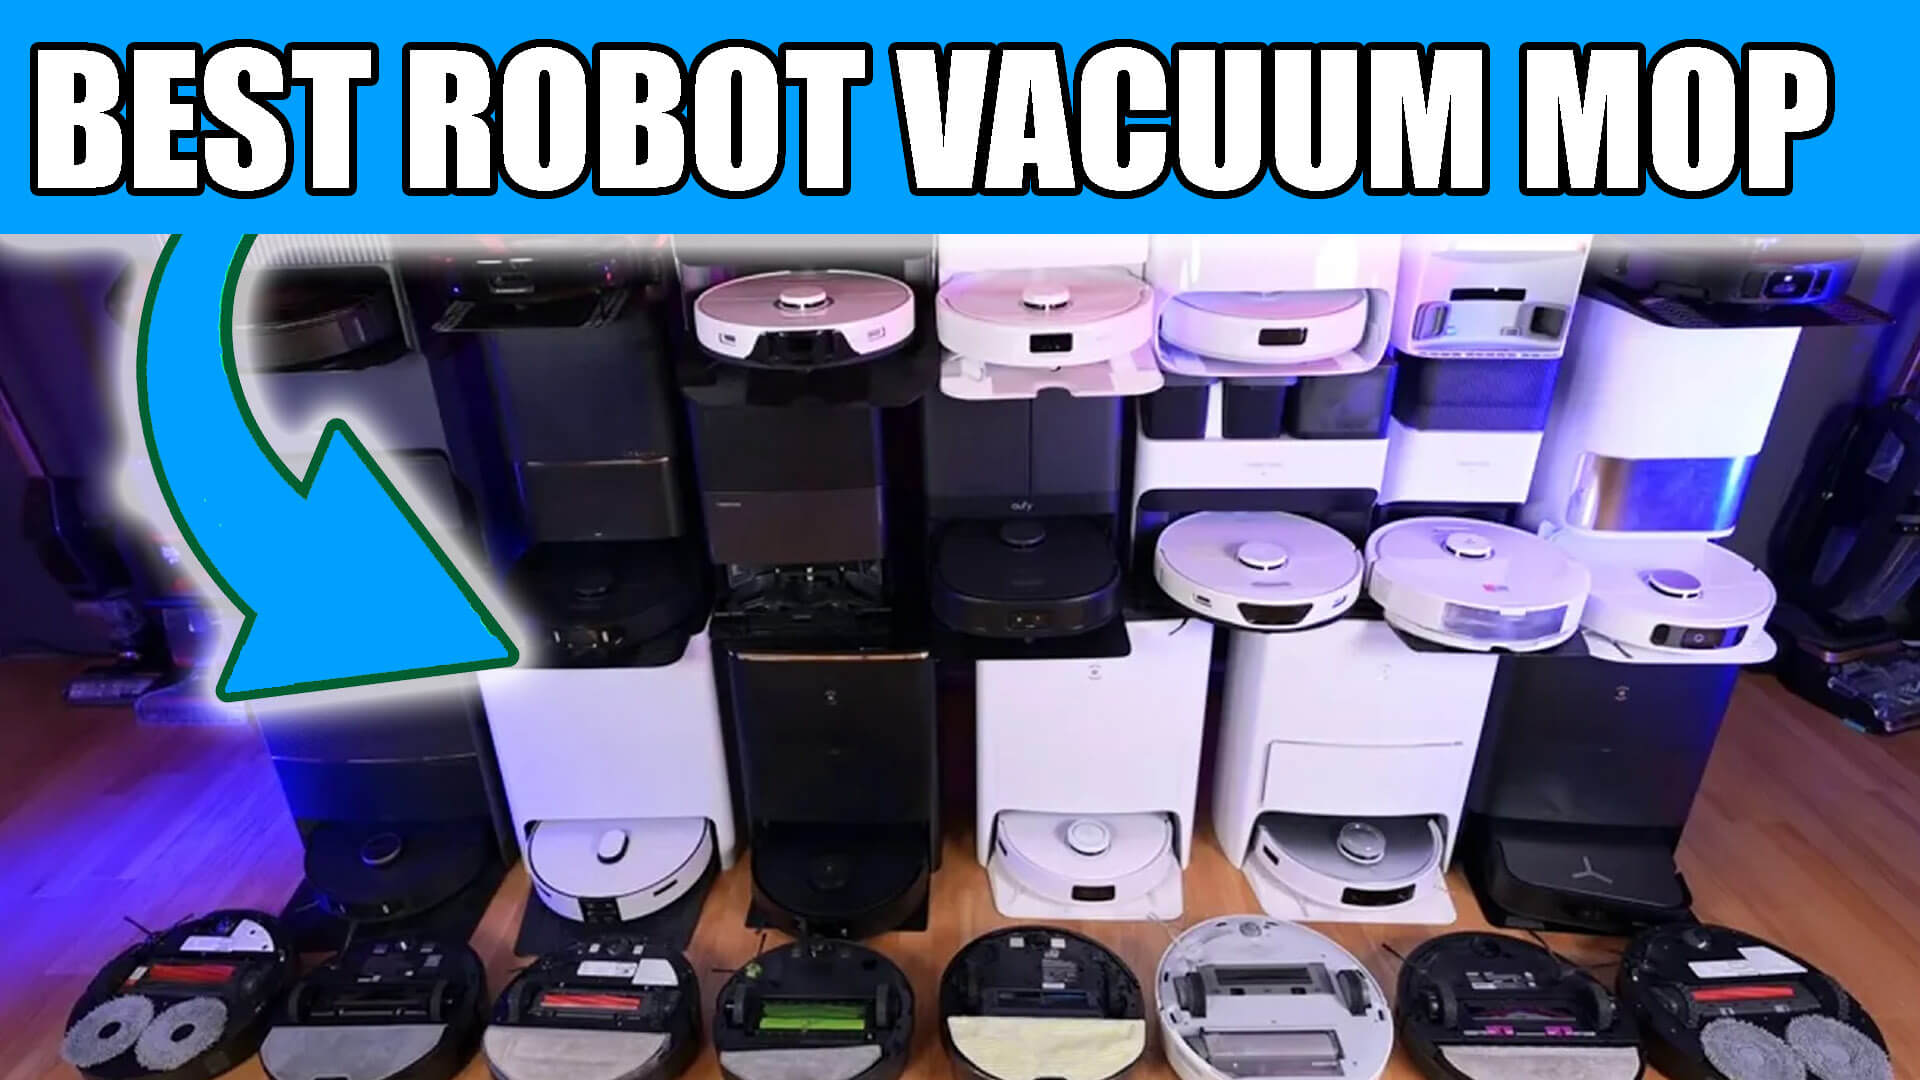
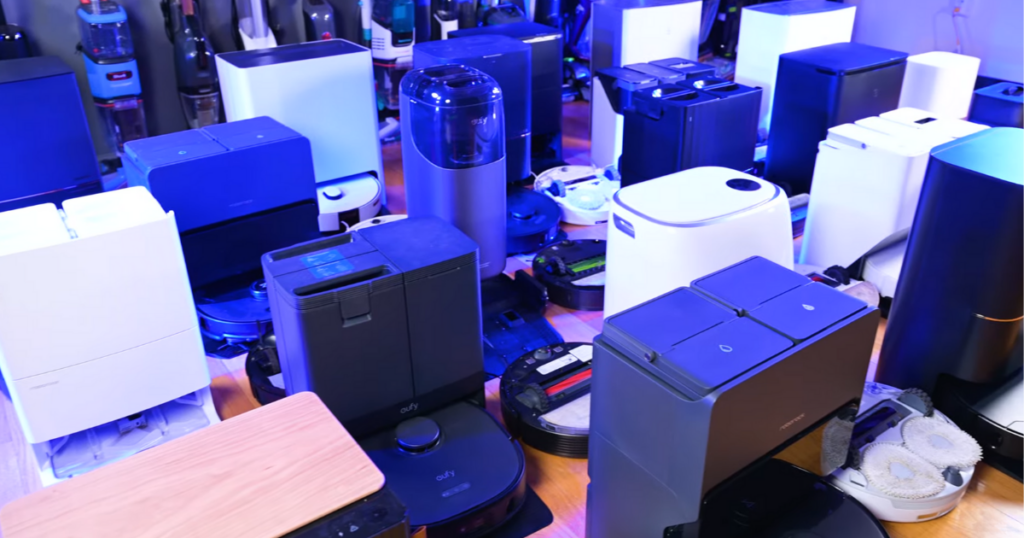
We’ve Independently Tested 150+ Robot Vacuums
Welcome to Vacuum Wars’ definitive guide to the best robot vacuum mop combos! Because we purchase every robot vacuum ourselves, our recommendations are based on in-house tests of both vacuuming and mopping abilities (not manufacturer hype). Having tested over 150 robot vacuums (including many hybrids), we know which combos actually scrub away grime rather than just drag a damp cloth. Our rigorous trials compare suction power, stain removal, navigation smarts, and even how well each robot’s self-cleaning dock works. In short, the models below can truly vacuum and mop in one go, delivering a deeper clean with less effort. Want to see how we keep the process fair? Why You Can Trust Vacuum Wars Robot Vacuum Reviews.
Note: Our rankings are updated frequently and can change daily based on several factors. These can include fluctuations in updated review scores, adjustments to our ranking algorithm, and whether a product has been discontinued. This ensures that our list remains as accurate and up-to-date as possible.
Why You Can Trust Vacuum Wars Robot Vacuum Reviews
Vacuum Wars remains completely independent. We purchase every robot vacuum mop combo we test at full price and never accept freebies or sponsorships. Each model goes through the exact same vacuum-and-mop test regimen, ensuring our results are fair, unbiased, and based on data. Learn more about our process at the How We Test Robot Vacuums page.

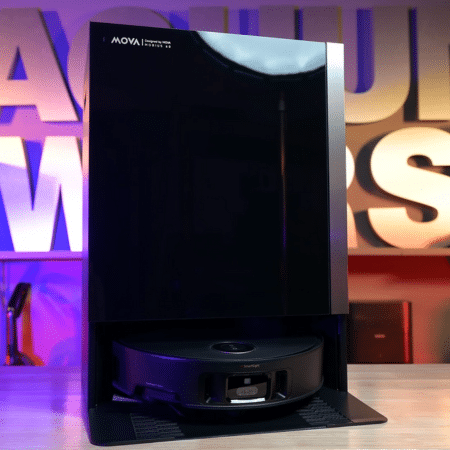
Our Pick: MOVA S10
✓ 1 Vibrating Mop Pad | ✓ Lifts Mop Pad on Carpet | ✓ Applies Downward Pressure
The MOVA S10 robot vacuum and mop combo impressed us in testing while also packing in some strong headline specs. It uses top-mounted LiDAR to map your home and clean in neat, efficient rows, and combines that with a 7000Pa suction port that’s marketed as especially effective for pet owners, picking up debris and pet hair on both hard floors and carpets without tangling. In our tests, it earned one of the best carpet deep-clean scores we’ve seen at 90%, which is remarkable at this price point. The S10 intelligently detects surfaces, raising its mops by 7 mm to protect carpets from moisture during vacuuming, and the app allows you to adjust suction, patterns, schedules, and create multiple maps and no-mop zones. Overall, the combination of strong performance, modern mapping, and pet-friendly suction makes the MOVA S10 an excellent entry into the world of robot vacuums. See additional info
Price as of March 3, 2026
Mopping: Lifts Mop Pad on Carpets | RoboSwing Technology for Hard to Reach Areas
Hardware: 20mm Threshold Crossing
Performance: Carpet Boost Settings
Mapping / Navigation: Multi Level Maps | Virtual Barriers and No Go Zones
Controls: Third-Party Voice Control Options
| Scores | Mova S10 | Average Robot Vacuum Tested |
|---|---|---|
| Vacuum Wars Overall | 2.99 | 2.58 |
| Features | 3.28 | 3.28 |
| Mopping Performance | 2.41 | 2.39 |
| Obstacle Avoidance | 0.83 | 3.39 |
| Pet | 3.05 | 3.42 |
| Navigation | 3.93 | 3.21 |
| Battery | 3.66 | 2.56 |
| Performance | 4.18 | 3.56 |
| Official Battery Life: 260 Minutes | Navigation Type: Spinning Lidar |
| Official Suction Power: 7000 Pa | Dust Bin Size: 350ml |
| Obstacle Avoidance Type: 3D Structured Light | Objects Recognized: 0 |
| Multi Level Maps: Yes | Virtual Barriers: Yes |
| Detergent Capacity: N/A | Disposable Bag: N/A |

Our Pick: Yeedi M14+
✓ Roller Mop | ✓ Wash & Dries Mop Pads | ✓ Lifts Mop Pad on Carpet | ✓ Auto Detergent Filling | ✓ Self Cleaning

The Yeedi M14+ is a robot vacuum-and-mop combo built around 18,000Pa suction and a 200 rpm Ozmo Roller mopping system designed to scrub floors while using smart water control for quicker drying. It pairs with an Omni-Station that automates maintenance with 167°F hot-water mop washing, 145°F hot-air drying, plus auto-emptying and auto-refilling to keep the system low-effort and odor-resistant. For hair and edges, it features ZeroTangle 3.0 and TruEdge 2.0 edge cleaning, along with AIVI 3D 3.0 obstacle avoidance, Embedded dToF Lidar navigation, and it can auto-lift the mop for carpets while cleaning through the Yeedi app. It’s rated for up to 241 minutes of runtime, supports app/touch/voice control, and works with Amazon Alexa/Google Home. See additional info
Price as of March 3, 2026
Auto Empty Station: Self Empties Debris | Washes Mop Roller | Washes Mop Roller with Hot Water | Dries Mop Roller | Dries Mop Roller with Heated Air| Self Cleaning | Dirty Water Sensor
Mopping: Lifts Mop Roller on Carpets | Extending Mop Roller for Hard to Reach Areas
Hardware: Removes Hair from Brush Roll
Performance: Carpet Boost Settings
Mapping / Navigation: Multi Level Maps | Virtual Barriers and No Go Zones
Controls: Third-Party Voice Control Options (Alexa, Siri, Google Assistant)
| Scores | Yeedi M14+ | Average Robot Vacuum Tested |
|---|---|---|
| Vacuum Wars Overall | 3.75 | 2.58 |
| Features | 3.88 | 3.28 |
| Mopping Performance | 2.84 | 2.39 |
| Obstacle Avoidance | 3.34 | 3.39 |
| Pet | 4.51 | 3.42 |
| Navigation | 3.66 | 3.21 |
| Battery | 2.90 | 2.56 |
| Performance | 4.21 | 3.56 |
| Official Battery Life: 241 Minutes | Navigation Type: Embedded dToF Lidar |
| Official Suction Power: 18000 Pa | Dust Bin Size: 220ml |
| Obstacle Avoidance Type: Camera, Edge Sensor, LED, & 3D Structured Light | Objects Recognized: 0 |
| Multi Level Maps: Yes | Virtual Barriers: Yes |
| Detergent Capacity: N/A | Disposable Bag: 3L |
Robot Vacuum Mop Systems Explained
Flat pad, dual spinning pad, and roller mop systems all clean differently. See how each design works—and what our real-world testing shows about stain removal and water handling. Learn About Robot Vacuum Mop Systems

Our Pick: Roborock Qrevo CurvX
✓ 2 Spinning Mop Pads | ✓ Wash & Dries Mop Pads | ✓ Lifts Mop Pad on Carpet | ✓ Applies Downward Pressure | ✓ Extending Mop Pad
The Roborock Qrevo CurvX is a robot vacuum-mop combo engineered for truly hands-free cleaning that delivers an impressive 22,000 Pa HyperForce suction. With a Dual Anti-Tangle System and a DuoDivide main brush it handles deep carpet debris, pet fur, and long hair. Its ultra-slim profile—just 3.14″ tall—lets it access dust hiding under sofas and cabinets, while the AdaptiLift Chassis lifts the entire unit up to 4 cm to smoothly traverse thresholds and navigate furniture legs. Mop care is high tech: dual-spinning mops, 80 °C hot water mop washing plus dock self-cleaning, warm air drying, auto tank refilling, auto dust emptying, and a detachable base make maintenance easy. Navigation is powered by RetractSense LiDAR, which automatically retracts under low furniture into a 100° rear field of view and extends for full 360° scans when clear. Reactive AI obstacle recognition system with structured light and RGB camera detects and avoids 108 object types. Control options include Amazon Echo/Google Home and “Hello Rocky” voice assistant. The multifunctional Dock 3.0 Thermo+ not only washes, dries and empties, but also offers intelligent dirt detection—while pet owners will appreciate video call / two-way voice features and automatic pet detection and avoidance. See additional info
Price as of March 3, 2026
Auto Empty Station: Self Empties Debris | Washes Mop Pad | Washes Mop Pad with Hot Water | Dries Mop Pad | Dries Mop Pad with Heated Air| Self Cleaning | Dirty Water Sensor
Mopping: Lifts Mop Pads on Carpets | Extending Mop Pad for Hard to Reach Areas
Hardware: Auto Extending Side Brush for Hard to Reach Areas | 40mm Threshold Crossing | Removes Hair from Brush Roll
Performance: Carpet Boost Settings
Mapping / Navigation: Multi Level Maps | Virtual Barriers and No Go Zones
Obstacle Avoidance: 108 Objects Recognized
Pet Features: Live Video Monitoring | Pet Checkup or Similar
Controls: Virtual Assistant Options
| Scores | Roborock Qrevo CurvX | Average Robot Vacuum Tested |
|---|---|---|
| Vacuum Wars Overall | 4.01 | 2.58 |
| Features | 4.03 | 3.28 |
| Mopping Performance | 3.69 | 2.39 |
| Obstacle Avoidance | 4.17 | 3.39 |
| Pet | 4.72 | 3.42 |
| Navigation | 4.07 | 3.21 |
| Battery | 3.87 | 2.56 |
| Performance | 4.26 | 3.56 |
| Official Battery Life: 220 Minutes | Navigation Type: RetractSense Lidar |
| Official Suction Power: 22000 Pa | Dust Bin Size: 258ml |
| Obstacle Avoidance Type: Single Camera & Structured Light | Objects Recognized: 108 |
| Multi Level Maps: Y | Virtual Barriers: Y |
| Detergent Capacity: unknown | Disposable Bag: 2.7L |

Our Pick: Dreame L50 Ultra
✓ 2 Spinning Mop Pads | ✓ Wash & Dries Mop Pads | ✓ Lifts Mop Pad on Carpet | ✓ Can Leave Mop Pads at Base | ✓ Applies Downward Pressure | ✓ Extending Mop Pad | ✓ Auto Detergent Filling | ✓ Self Cleaning
The Dreame L50 Ultra is a robot vacuum/mop combo featuring a ProLeap™ system with retractable legs that enable it to climb over obstacles up to 2.36 in (6 cm) and vertical steps up to 1.65 in (4.2 cm), supported by a shock‑absorbing design rated for 30,000 cleaning cycles. It delivers up to 19,500 Pa of Vormax™ suction and uses a HyperStream™ Detangling DuoBrush to remove debris and long hair (up to 11.8 in) with reduced tangling and noise. With Dual Flex Arm Technology, extendable side brush, and mop reach, it can clean into tight corners and under low furniture; TripleUp Tech allows it to lift mop pads (0.413 in) during vacuuming for multi-surface coverage. Its dock uses the AceClean™ DryBoard system: 167 °F hot‑water cleaning of mop pads across four temperature settings, followed by hot‑air drying, and auto‑empties dust into a 3.2 L bag that lasts up to 100 days. Additional features include AI-driven obstacle avoidance using RGB and 3D structured light, LED path illumination, app control via Dreamehome, and automated water refill with sensor-based rewashing and remopping. See additional info
Price as of March 3, 2026
Auto Empty Station: Self Empties Debris | Washes Mop Pads | Washes Mop Pads with Hot Water | Dries Mop Pads | Dries Mop Pads with Heated Air| Self Cleaning | Dirty Water Sensor
Mopping: Lifts Mop Pads on Carpets | Extending Mop Pad for Hard to Reach Areas | Can Leave Pads at Base while Vacuuming
Hardware: Auto Extending Side Brush for Hard to Reach Areas | 60mm Threshold Crossing | Removes Hair from Brush Roll
Performance: Carpet Boost Settings | Dirt Detect
Mapping / Navigation: Multi Level Maps | Virtual Barriers and No Go Zones
Obstacle Avoidance: 180 Objects Recognized
Pet Features: Live Video Monitoring | Pet Checkup or Similar
Controls: Third-Party Voice Control Options
| Scores | Dreame L50 Ultra | Average Robot Vacuum Tested |
|---|---|---|
| Vacuum Wars Overall | 4.04 | 2.58 |
| Features | 4.0 | 3.28 |
| Mopping Performance | 2.88 | 2.39 |
| Obstacle Avoidance | 4.17 | 3.39 |
| Pet | 4.92 | 3.42 |
| Navigation | 3.60 | 3.21 |
| Battery | 2.54 | 2.56 |
| Performance | 4.24 | 3.56 |
| Official Battery Life: 200 Minutes | Navigation Type: Spinning Lidar |
| Official Suction Power: 19500 Pa | Dust Bin Size: 395ml |
| Obstacle Avoidance Type: Single Camera, 3D Structured Light, & LED | Objects Recognized: 180 |
| Multi Level Maps: Y | Virtual Barriers: Y |
| Detergent Capacity: Unknown | Disposable Bag: 3.2L |

Our Pick: MOVA Mobius 60
✓ 2 Spinning Mop Pads | ✓ Wash & Dries Mop Pads | ✓ Lifts Mop Pad on Carpet | ✓ Can Leave Mop Pads at Base | ✓ Applies Downward Pressure | ✓ Extending Mop Pad | ✓ Auto Detergent Filling | ✓ Mop Pad Garage
The Mova Mobius 60 is a premium robot vacuum-mop combo built for hands-off cleaning, pairing up to 30,000Pa suction with a MopSwap™ system that can automatically select among three interchangeable pads (ThermoHold for greasy kitchens, Plush for wood floors, and HyperClean for all-around use). It boosts carpet pickup with a pressure-retention baffle, uses triple anti-tangle mechanisms for hair, and employs StepMaster 2.0 retractable legs to clear obstacles up to 80mm (about 3.14″). FlexScope™ navigation uses a retractable sensor for better low-clearance reach, while AI SmartSight with a structured-light 3D scanner (plus LED fill light) can recognize 240+ obstacles. For edge work, the side brush extends and lifts 10mm, and the RoboSwing mop extends with a 10.5mm lift to avoid carpets. The all-in-one base auto-empties into a 3.2L bag, auto-refills, and hot-washes pads at up to 212°F, with JetSpray Dryboard nozzles, 100°C PTC heating, UV sterilization, and dust-bag drying; onboard capacity includes a 6,400mAh battery, 300mL dust box, and 5.5L/4.0L clean/used-water tanks, plus “Hey, MOVA” voice control. See additional info
Price as of March 3, 2026
Auto Empty Station: Self Empties Debris | Washes Mop Pad | Washes Mop Pad with Hot Water | Dries Mop Pad | Dries Mop Pad with Heated Air| Self Cleaning
Mopping: Lifts Mop Pads on Carpets | Extending Mop Pad for Hard to Reach Areas | Can Leave Pads at Base while Vacuuming | Can Switch Pads at Base for Different Areas
Hardware: Auto Extending Side Brush for Hard to Reach Areas | Up to 80mm Threshold Crossing | Removes Hair from Brush Roll
Performance: Carpet Boost Settings
Mapping / Navigation: Multi Level Maps | Virtual Barriers and No Go Zones
Obstacle Avoidance: 240 Objects Recognized
Pet Features: Live Video Monitoring | Pet Checkup or Similar
Controls: Virtual Assistant Options
| Scores | Mova Mobius 60 | Average Robot Vacuum Tested |
|---|---|---|
| Vacuum Wars Overall | 4.02 | 2.58 |
| Features | 4.06 | 3.28 |
| Mopping Performance | 2.92 | 2.39 |
| Obstacle Avoidance | 4.59 | 3.39 |
| Pet | 4.80 | 3.42 |
| Navigation | 3.12 | 3.21 |
| Battery | 2.07 | 2.56 |
| Performance | 4.19 | 3.56 |
| Official Battery Life: Unknown | Navigation Type: FlexScope dToF Lidar |
| Official Suction Power: 30000 Pa | Dust Bin Size: 300ml |
| Obstacle Avoidance Type: Single Camera, 3D Structured Light, & LED | Objects Recognized: 240 |
| Multi Level Maps: Yes | Virtual Barriers: Yes |
| Detergent Capacity: 600ml (400ml Floor Cleaner/200ml Specialized Solution) | Disposable Bag: 3.2L |

Our Pick: Dreame Matrix10 Ultra
✓ 2 Spinning Mop Pads | ✓ Wash & Dries Mop Pads | ✓ Lifts Mop Pad on Carpet | ✓ Can Leave Mop Pads at Base | ✓ Applies Downward Pressure | ✓ Extending Mop Pad | ✓ Auto Detergent Filling | ✓ Mop Pad Garage

The Dreame Matrix10 Ultra robot vacuum/mop combo features a multi-mop switching dock with a three-solution compartment, producing up to 30,000 Pa of Vormax™ suction and using HyperStream™ Detangling DuoBrush rollers. It employs OmniSight™ navigation to detect over 240 object types and a ProLeap™ system to overcome obstacles up to 80mm high, while its Dual Flex Arm technology extends side brush and mop into corners. The mop pads self-clean at 212 °F with 20 spray nozzles, and lift 10.5mm on carpets to avoid moisture. Its multifunctional PowerDock™ supports auto-emptying a 3.2 L dust bag for up to 100 days, auto water refill, auto solution refill, mop pad and dust bag drying. It also includes voice control options (“OK Dreame” built-in virtual assistant, Alexa/Siri/Google Home) and Matter protocol smart-home integration. See additional info
Price as of March 3, 2026
Auto Empty Station: Self Empties Debris | Washes Mop Pad | Washes Mop Pad with Hot Water | Dries Mop Pad | Dries Mop Pad with Heated Air| Self Cleaning | Dirty Water Sensor
Mopping: Lifts Mop Pads on Carpets | Extending Mop Pad for Hard to Reach Areas | Can Leave Pads at Base while Vacuuming | Can Switch Pads at Base for Different Areas
Hardware: Auto Extending Side Brush for Hard to Reach Areas | Up to 80mm Threshold Crossing | Removes Hair from Brush Roll
Performance: Carpet Boost Settings
Mapping / Navigation: Multi Level Maps | Virtual Barriers and No Go Zones
Obstacle Avoidance: 240 Objects Recognized
Pet Features: Live Video Monitoring | Pet Checkup or Similar
Controls: Virtual Assistant Options
| Scores | Dreame Matrix10 Ultra | Average Robot Vacuum Tested |
|---|---|---|
| Vacuum Wars Overall | 3.86 | 2.58 |
| Features | 4.11 | 3.28 |
| Mopping Performance | 3.46 | 2.39 |
| Obstacle Avoidance | 3.96 | 3.39 |
| Pet | 4.67 | 3.42 |
| Navigation | 3.15 | 3.21 |
| Battery | 2.28 | 2.56 |
| Performance | 3.65 | 3.56 |
| Official Battery Life: 260 Minutes | Navigation Type: VersaLift dToF Lidar |
| Official Suction Power: 30000 Pa | Dust Bin Size: 310ml |
| Obstacle Avoidance Type: Single Camera, 3D Structured Light, & LED | Objects Recognized: 240 |
| Multi Level Maps: Yes | Virtual Barriers: Yes |
| Detergent Capacity: unknown | Disposable Bag: 3.2L |
The Rise of Robot Vacuum and Mop Combos: How We Test and Score the Best Models
Robot vacuum and mop combos have rapidly become one of the most compelling reasons to invest in a smart floor cleaner. With continuous improvements in both vacuuming and mopping capabilities, these devices offer an increasingly efficient and convenient solution for maintaining clean floors. Every week seems to bring new features that enhance their mopping performance, making them more versatile than ever before.
Why Update Our Testing System
At Vacuum Wars, we’ve always prided ourselves on thorough and objective testing. As technology evolves, we occasionally adjust our system for testing and scoring robot mops to keep up with innovations in the field. At different times, we develop new testing systems and re-test popular models to see which robot vacuums excel and which fall short. Renewing our approach allows us to provide a more accurate and up-to-date evaluation of the current market, ensuring consumers are informed about the best robot vacuum and mop options available.
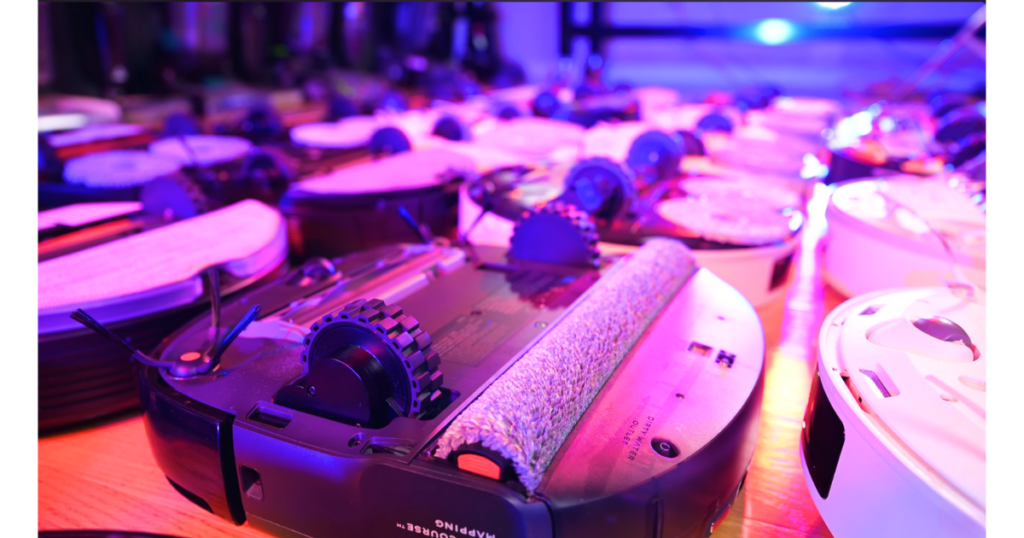
Different Types of Robot Vacuum Mop Systems Explained
Robot vacuum mop systems generally fall into three categories, each offering a unique approach to mopping:
- Fixed Pad Systems: These range from simple designs, such as microfiber pads attached to gravity-fed water tanks, to more advanced systems with vibrating modules and electronically controlled water flow.
- Spinning Pad Systems: These models use two spinning pads with electronic water flow, offering a more dynamic mopping action, especially effective for scrubbing hard floors.
- Single Spinning Roller Systems: A newer category, these systems incorporate a single spinning roller and a squeegee mechanism to continuously wring out the roller. This makes them particularly good at handling wet spills and liquid messes.
Key Features to Consider When Choosing a Robot Vacuum and Mop Combo
One of the most significant advancements in recent years is the introduction of self-rising mop pads. Earlier models required users to manually attach mop plates and set no-go zones for carpets. However, most high-end robot mops now automatically lift their pads when carpets are detected, allowing them to vacuum and mop in one seamless run.
Another game-changer is the auto mop pad washing station. In addition to emptying the dustbin, these advanced docks clean and dry the mop pads, refill water tanks, and dispose of dirty water. This level of automation makes it difficult to return to manual mopping and vacuuming once you’ve experienced the convenience.
Scoring Robot Vacuum Mop Combo Features
At Vacuum Wars, we score each robotic vacuum mop based on a comprehensive set of features, ensuring that our evaluations cover both performance and user-friendly functionalities. Here are some of the key features we assess:
- No mop zones: Ensures the robot avoids areas like carpets while mopping.
- Adjustable water levels: Allows customization of water usage for different floor types.
- Auto mop wash: Automatically cleans mop pads between runs.
- Auto refill tank: Refills the water tank without user intervention.
- Auto dirty water empty: Automatically disposes of dirty water collected during mopping.
- Auto mop pad drying: Dries the mop pads after use to prevent odor and mildew.
- Auto Mop lifting: Lifts the mop pads when carpets are detected, improving convenience.
- Vibrating or spinning pads: Enhances mopping performance by scrubbing floors more effectively.
- Pressurized mopping: Increases downward pressure for better cleaning on stubborn stains.
- Special mop edge cleaning: Focuses cleaning power on edges and corners, an area often overlooked.
- Electric mop: Uses electricity for enhanced mopping action.
- Hot water washing: Provides superior cleaning by using heated water for tougher stains.
- Mop pad magnets: Helps the mop pads attach securely for consistent cleaning.
- Wet liquid processing: Effectively manages wet spills and liquids.
- Mop stain test: Evaluates how well the robot handles tough, dried-on stains.
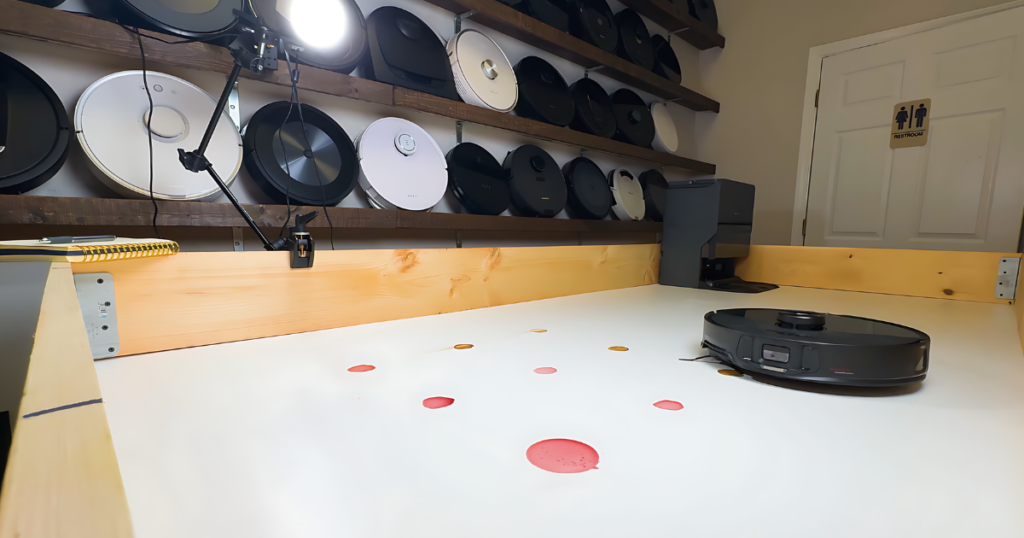
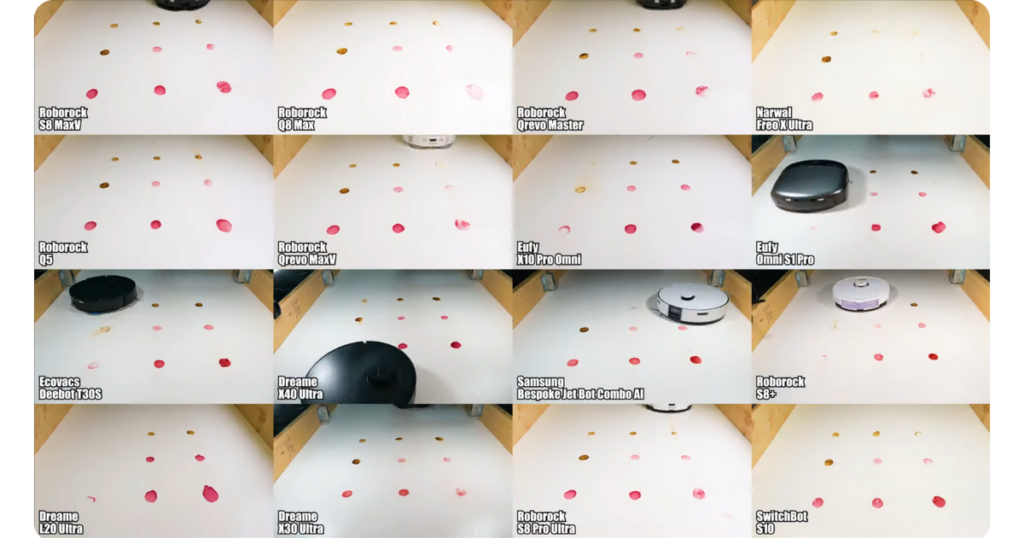
Our Proven Method for Testing Robot Vacuum Mop Combos
Our testing system is designed to objectively measure mopping performance. We apply a variety of tough stains—such as dried-on coffee and grape juice—using precise quantities of fluid for each stain. The stains are then dried and assigned difficulty levels. Each robot vacuum gets multiple runs to clean the stains, and their performance is scored accordingly.
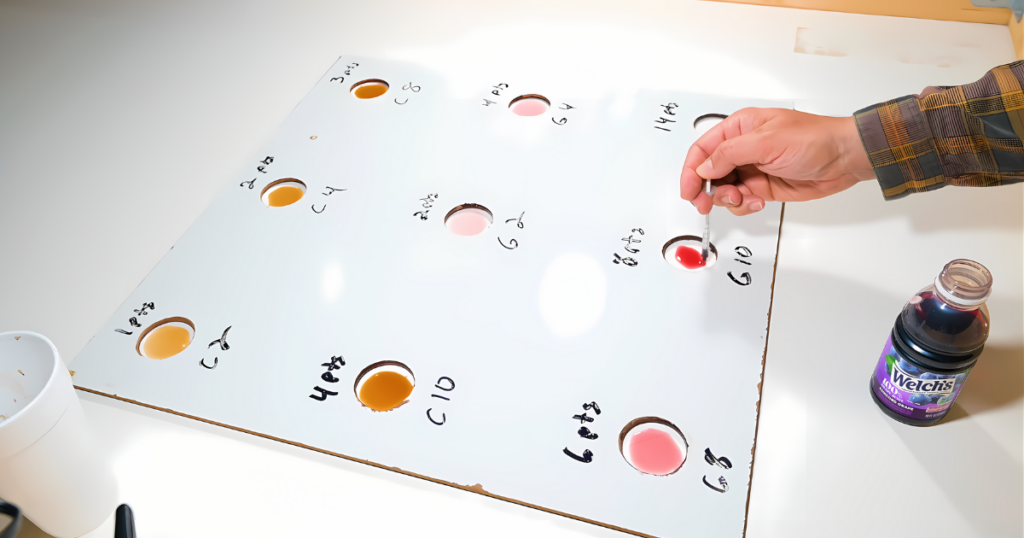
To ensure fairness, we control several variables during testing:
- Mop pads are pre-moistened and wrung out.
- If the robot has a dock with washing capabilities, we allow it to wash its pads between runs. If not, we do this manually.
- Obstacle avoidance is disabled to keep the focus on mopping efficiency.
- The robot’s cleaning path is set to “standard.”
- Water levels are set to maximum, and no mop solution is used to standardize results.
- Each test consists of a perimeter run followed by standard back-and-forth cleaning passes. Repeated runs are stopped manually to maintain consistency.
Water usage is measured separately by weighing a paper towel before and after a run, and devices are penalized for leaving behind excessive water. Ultimately, each product’s total score factors in both stain removal and responsible water output, allowing for an objective ranking of mopping performance.
How Vacuum Wars Tests Robot Vacuums: Step into the world of Vacuum Wars, where real-world tests, straight-forward reviews, and no sponsored products redefine robot vacuum evaluations.
Why Our Testing Matters
Our methodology provides a clear, objective look at which robot mop systems excel and which need improvement. With these standardized evaluations, we can offer accurate insights into performance, making it easier for consumers to find the best models for their needs.
#NotSponsored Vacuum Cleaner Reviews
Vacuum Wars has made a significant shift towards complete independence by officially adopting a policy of not accepting free products from companies or doing sponsored content. This ensures that all reviews are based on products purchased with our own funds, thereby eliminating potential bias that might come from manufacturer influence.
Frequently Asked Questions (FAQ) About Robot Vacuum Mop Combos
What is a robot vacuum and mop combo?
A robot vacuum mop combo is a device that combines both vacuuming and mopping functions into one automated unit. It can vacuum debris and dust from floors, then use a mop attachment with water or cleaning solution to mop hard surfaces, providing a comprehensive floor-cleaning solution. Many also come with an automated station to handle key water management tasks.
What features should I look for in a robot vacuum and mop combo?
Some key features to consider include self-rising mop pads to avoid carpets, auto mop pad washing and drying stations, adjustable water levels, no-mop zones, and strong suction power for vacuuming. Advanced features like vibrating mops and pressurized mopping can also enhance cleaning performance.
Can a robot vacuum mop work on all types of flooring?
Most robot mop devices are designed to work on hard floors such as tile, laminate, hardwood, and vinyl. For carpeted areas, many models use features like no-mop zones or self-rising mop pads to protect carpets from moisture during mopping.
Do I need to manually change from vacuuming to mopping mode?
Higher-end robot mops can switch between vacuuming and mopping automatically, depending on the surface they’re cleaning. Many advanced models can detect when they are on carpet versus hard floors and will lift the mop or avoid the carpeted area altogether.
Can I use cleaning solutions with robot vacuum mops?
Some robot vacuum mops are compatible with specific cleaning solutions, while others may only be designed for use with water. Always check the manufacturer’s instructions before using any cleaning solution to avoid damaging the device or voiding the warranty.
How well do robot vacuum mops handle pet hair and stains?
Robot vacuum mops are generally good at handling pet hair, especially those with strong suction power and anti-tangle brushes. For stains, the effectiveness depends on the model. Features like vibrating or pressurized mopping systems and self-cleaning pads can help tackle tougher messes.
Are robot vacuum mops worth the investment?
Robot vacuum mops are worth the investment if you’re looking for a device that can help maintain clean floors with minimal manual effort. They are excellent for daily upkeep, making them ideal for busy households, especially those with pets or kids.
Still robot vacuum shopping? Check out our robot vacuum reviews, comparisons and guides.
More Best Robot Vacuums: Top 20 | Under $300 | $300 to $600 | $600 to $1,000 | $1,000 to $1,300 | $1,300 to $1,600 | $1,600 and Up | Obstacle Avoidance | Pet Hair | Mopping